Teachers' Domain - Digital Media for the Classroom and Professional Development
User: Preview
Digital media is now a major part of our lives. You and your students can do more than just watch digital video: You can create your own video—an exciting way to enhance both teaching and learning in any subject area. Students can work at their own pace and exercise their creativity. Video production can be a powerful motivational tool, especially for students whose learning styles aren't supported by traditional educational approaches.
In this activity, you'll experience what it's like to go through the video production process. This will help you guide your students through this process. You'll create a portfolio to track your experience, and keep classroom-planning notes to develop a successful video-production activity for your students.

This activity will walk you through the typical steps of the video production process:

Video: 1m 47s
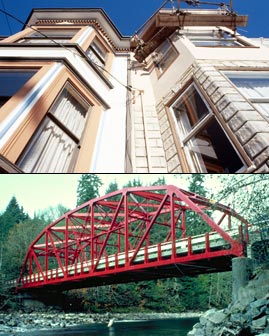
Before you produce a video, you must decide what it will be about. As an example, we will focus here on how to understand structures and forces, which is taught as part of physical science/engineering. You can apply the steps and the principles you learn here to nearly any topic.
Here is a fun and creative video on structures and forces. Using playful animations and engaging descriptions, it explores how arch bridges are constructed to resist—and transfer—the forces acting upon them.
Watch the video and then jot down your answers to these questions:
Think about a topic you teach that would benefit from a visual presentation. Would you and your students engage more fully if your lesson included a video production activity?
For some inspiration, search or browse through Teachers' Domain to see what videos are available on this topic.
Now generate a list of questions like those above that would help your students connect the selected topic to their own experience.
Once you have a topic, you must then figure out the key points you want to get across. This will help you determine what footage to tape or find, what interview questions to ask, and how to edit your video.
Consider the video about the arch bridge. Write down your response to these questions:
Now, take a few minutes to identify the ideas and information you want to convey about the structure you've selected. To start, you might think about what you find most interesting or surprising about it. Ultimately, you should be able to answer these important questions: What impression do you want to leave your audience with, and what do you want them to know by watching the video you produce? It's probably best to limit your content objective to one or two key ideas.
At this point, also consider the presentational approach for your video: Might it be a persuasive piece that takes a side? A documentary that presents all points of view equally? A dramatized story? An interview with an expert or with people on the street? Something else?
What challenges would students face in trying to identify a focus for their video project? What might you do to encourage creativity, while still helping them focus their research and further their understanding of the topic?
Given your content objective, begin to think about the types of visuals that would help you to illustrate the points you want to get across; e.g., how the structure was built and why a particular design was used. You can work with existing footage that you find, known as stock footage, or go out with a camera and videotape your own footage and interviews.
The "Building Blocks" offered here are stock video clips that might be useful in your video about your chosen structure. You have permission to download any of them and edit them into a video you make. Take notes about the clips that interest you.
You can find links to other stock footage and image sources on the resources page at the end of this activity.
Keep in mind: Just because you can find media on the Internet, it does not mean that you have legal permission to download and reuse it. To use what you find in your own videos, you either need to get it from sources that grant permission upfront for your intended use, or you must seek permission from the owner. Assessing the rights of the media you find will save you time in the long run.
If you are planning to videotape your own footage, "scout" your area for good locations to tape, and if you plan to interview, figure out who may have interesting things to say about the structure. Note: If you want to post your video on a public site, you need to have written permission from property owners to record video on their property, and from interviewees to use what you record.
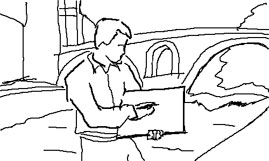
In your treatment, you outline what you want your video to show and say, and how you want it to look and sound. The treatment can be a text document or in graphic format (known as a storyboard).
Take a look at the Arch Bridge Treatment (PDF), a sample of what might have been used to create the video you watched. Note how it is structured and the types of information it contains.
Using the Video Treatment Worksheet (PDF) or a computer, draft a text treatment or storyboard for your video about a structure. Be sure to include the content objective that you identified previously. Think about the "hook" that will grab your audience's attention, the order in which you will present your information, and the types of visuals that will help tell your story (e.g. stock footage, illustrations, new footage, photos, or interviews).
In addition to the video and still images you record yourself or acquire from Teachers' Domain, consider whether the following types of materials can help you meet the needs of your video project. For example, you can use animation to illustrate a physics concept about forces, or you can use stock footage to provide visuals that you do not tape yourself:
Your treatment, as well as the other documents in your portfolio, may be something you will want to share with your students as an example when they begin their video production activity.
Based on your experience, what issues do you think your students might encounter when writing a text treatment or creating a visual storyboard? How can you facilitate this process?
Whether or not you actually produce a video during this activity, it's important to think through the entire process so you're ready to assist your students. First we'll look at a way of keeping track of the video images, or shots, that you record.
Create the Shot List
Go through your treatment in detail to figure out the visuals you need to complete your project. If you are adding newly shot footage or photos, you'll need to create a list and plan how to get what you need. Review the stock video and images you found in the research phase to determine what else you still need to find or else record from scratch.
Use the Video Shot List Worksheet (PDF) to record this list.
Get the Equipment
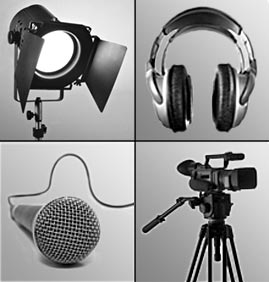
Now is a good time to think about the equipment you have available and to identify additional equipment you will need. In addition to a video camera, some of important pieces of equipment are:
For more on equipment, check out the resources at the end of this activity.
Inventory the equipment you have available to you and determine what you need to get before you begin a video production activity with your students. Think about how to stagger your students' production schedules so that they can take turns using limited equipment.
Revise the Treatment
Given what you now know, review your treatment and revise it as necessary. Can you complete your project as you first envisioned with the equipment you have? Can you videotape at the locations you want? Can you find the stock footage you need?
Early on in the pre-production process, it's okay to let students be wildly creative. But at this phase, help them review and revise their treatments, to avoid frustration down the line and give them a better chance of achieving their objectives. Think about how you might help your students reframe ideas that appear overly ambitious. Are there stock elements that might provide alternatives to some of the videotaping ideas they propose?

The script is your opportunity to plan out exactly what you want to say and how you want to say it, through narration, dialogue, interviews, and visuals. At this stage, you won't be able to identify all visual elements specifically, nor will you be able to script the answers your interview subjects might give, so what you write will be a working document.
Before you draft your own script, take some time to review the sample Arch Bridge Script (PDF). Note that this script is organized by scene and identifies what viewers would both see and hear at any given moment. Scripts can also contain notes about locations, action, lighting, camera angles and movements, transitions, and visual and sound effects. Although the length of scripts varies, you should expect that a two-page script will translate to a video that's about three minutes long—a good length to aim for in this activity.
With the sample script and your treatment as a guide, use the Video Script Worksheet (PDF) or a computer to write a draft script for your video on a structure.
When you've finished your script, write down your thoughts about this process. What helped you formulate your ideas and how might you help your students with scripting?
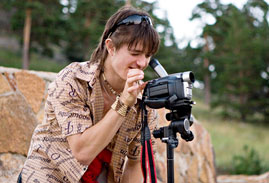
There's no substitute for experience in video production. However, it is possible to avoid some common errors and dramatically improve the quality of your video by keeping a few simple tips in mind. Review these Top Ten Tips for Recording Better Video and Audio (PDF), and then try practicing yourself. But don't worry about all these at once—focus on a few at a time.
After you record and review your footage, take a few minutes to write down what you think you could do to improve your techniques. If you can, make time for several practice sessions of your own before you begin the activity with your students. It's also a good idea to let your students practice and then review their recordings as a group before they begin videotaping material for their projects. This will improve the overall quality of their projects and give them a more rewarding experience.
For more on video and audio recording techniques, check out the resources at the end of this activity.
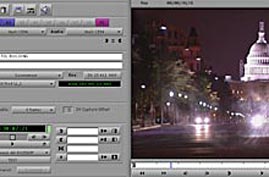
After you gather and create the elements for your video, the next step is to capture or import these elements into your editing system. Depending on the equipment you're using, you may need to digitize the video that you have shot or scan print images to create digital files that your software can access. Fortunately, this process is becoming increasingly easy, and often involves a simple import of a digital file from one device or software application to another.
Keep your digital files and all information about your assets (such as time code, source of the material, rights information, etc.) neatly organized. This will make completion of your project much easier.
For more on capturing digital assets, check out the resources at the end of this activity.
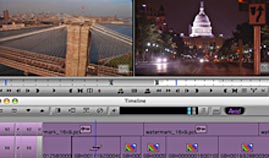
In video editing, you assemble, organize, and refine the elements you have compiled for your project. Although you will base your edit on your script, you must also take into account the actual visual and audio elements you have captured. It's not always possible to get the shot or sound bite you hoped for when you wrote the script. And sometimes you capture great things you weren't expecting!
The specific steps of digital video editing vary somewhat from one editing software and system to another. Here is the basic process:
As with other aspects of video production, there is a lot to be said for practice and experience in editing. However, this list of Top Ten Tips for Better Editing (PDF) may help you avoid some of the more common editing mistakes.
For more on digital video editing, check out the resources at the end of this activity.
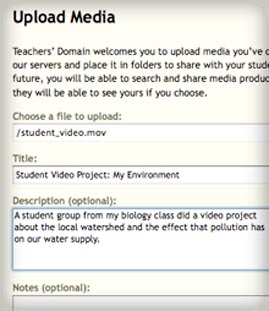
Once you've completed your video project, you'll probably want others to see it. Many independent video producers post their work on their own blogs or on sites such as YouTube. You can also use Teachers' Domain to share your videos with other educators. You can upload the videos to your personal folders, and share them with others in your personal groups: Select "Upload Media" under "My Folders." If you're happy with how your project or your students' project turned out, let us know about it and we may feature it on our site! (Add the video to one of your folders, then go to Contact Us. Type "Student Video for Public Viewing" in the message subject line, and include the folder name in the message).
Make sure you fully understand the rights to all of the media that you have incorporated into your video—including what you obtained from Teachers' Domain—before you post or distribute your video online.
Remember that whether you shot an interview with a person on the street, or downloaded video, music, or images, you need to make sure that you have the right to use these materials and that you have written proof—in the form of a permissions release—to do so.
For more on rights issues, review Obtaining Rights for Your Video Project (PDF), then check out the resources on the next page of this activity for links to sample location and appearance releases.
Now that you have completed the activity, write down a list of things you need to do or would like to do before starting a video production lesson with your students. Maybe you need to acquire some hardware or software? Perhaps you would like to go through these steps again with a topic of your choice so that you are even better prepared to guide your students through a successful video production activity.
Check out the following links for more resources about production and editing, digital storytelling, copyright law and open educational content, sample releases, and the film and video community.
Production and Editing
Digital Storytelling
Copyright Law and Open Content
Sample Releases
Film and Video Community
Teachers' Domain, Learning Through Video Production, published November 6, 2009, retrieved on ,
http://www.teachersdomain.org/resource/avd09.pd.tavidprod/
Media Type:
Self-paced Lesson


Professional Development:
WGBH is trying to develop materials that better meet the needs of our users. Please take this brief survey to share how you use these resources and to provide feedback on your experiences using these materials. Take the Survey!
This media-rich self-paced lesson designed for teacher professional development lets you experience what it's like to go through the video production process so that you can ultimately guide your students through this process. Walk though the typical steps, including research, treatment, scripting, and capturing digital assets. Create a portfolio to track your experience, and keep classroom-planning notes to develop a successful video-production activity for your students. This lesson also features a list of additional resources for further reference.
During this activity, you will learn about and have the opportunity to practice some of the basic steps involved in video production. You will watch videos produced by professionals, and review samples of documents, such as treatments and scripts, that are created as part of the video production process.
At various stages of the activity you will be prompted to take on a number of writing tasks. You may want to use a loose-leaf binder for your notes so that you can separate your notes into the three sections described below, as well as add copies of the printable worksheets and any text you print out from your computer:
You will be asked to record your thoughts on a particular subject, or your responses to questions posed in the activity.
As part of your work on a sample video production that you will experience as part of this activity, you will create working drafts of the types of documents video producers typically create during the pre-production process, such as treatments, scripts, and shot lists. Documents in your portfolio may serve as good examples for your students when they begin their video production activity.
You will be prompted to record your ideas about ways to help your students work on their video production activity, such as creating lists of equipment you would like to acquire or schedules you need to create.
To help improve this service, please report and describe any standards correlations that you find to be inaccurate.
Academic standards correlations on Teachers' Domain use the Achievement Standards Network (ASN) database of state and national standards, provided to NSDL projects courtesy of JES & Co.
![]()
We assign reference terms to each statement within a standards document and to each media resource, and correlations are based upon matches of these terms for a given grade band. If a particular standards document of interest to you is not displayed yet, it most likely has not yet been processed by ASN or by Teachers' Domain. We will be adding social studies and arts correlations over the coming year, and also will be increasing the specificity of alignment.
You must be signed in to see standards matches for your state.
 Loading Standards
Major funding for Teachers' Domain was provided by the National Science Foundation.
Teachers Domain® Home | Change Edition
About Teachers' Domain | Contact Us | Privacy Policy | Terms of Use
Teachers' Domain: © 2002-2025 WGBH Educational Foundation | shopPBS Educational Media
